Creating folders and navigating the files section
To create a new folder, click the "New " button in the top right corner of you Web Drive or right click anywhere in you Files Section, to select the option “Create Directory” in the appearing drop down menu.
- Name the folder and press “Create”.
- You can drag and drop files & folders into other folders by dragging them while holding your left mouse button.
- You can create as many folders and nest them within each other as you want. Organize, sort, and classify everything the way you want.
- Instead of drag & drop, you can also right-click on each file and folder and then use the “move” option in the menu that appears.
- To use the “move” function, hover your mouse over the “move” tab. To the right of the arrow, you can then select the destination of the file you want to move.
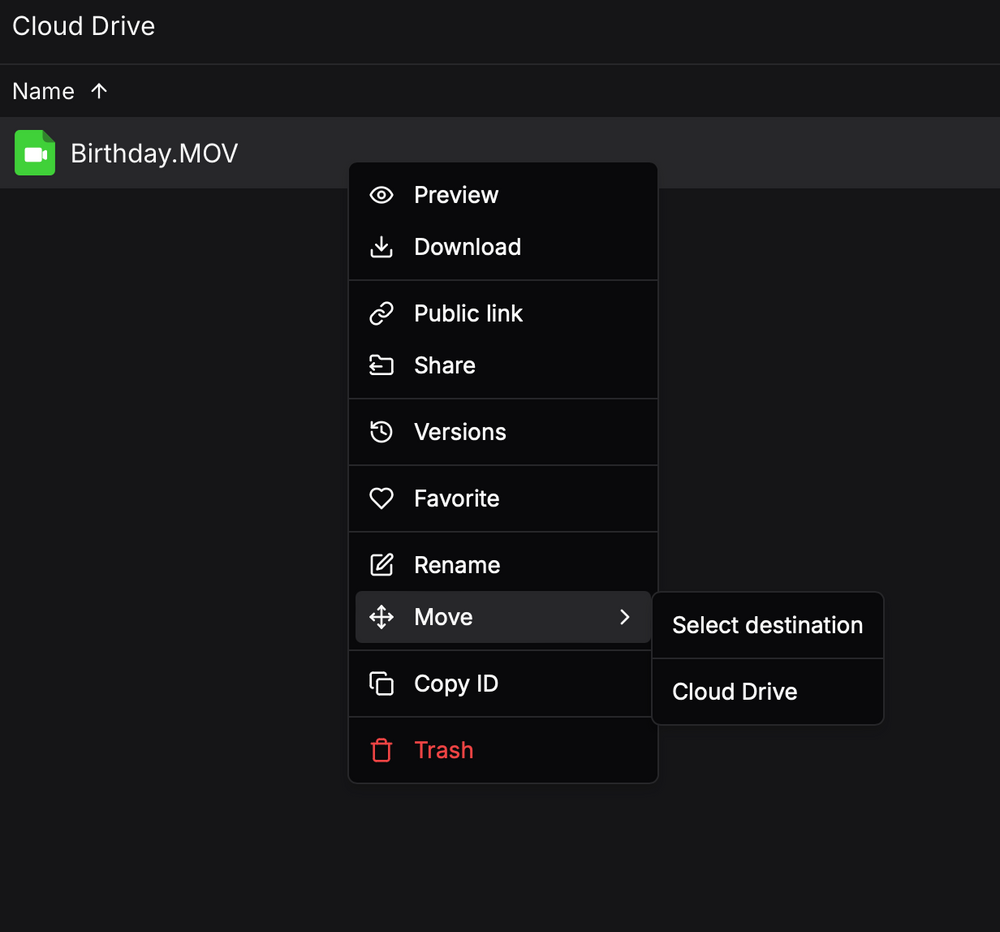
File Options
In the drop-down menu that appears as soon as you right-click on a file or folder, you can find additional settings or options such as:
- Preview the file.
- Download a file or folder.
- Public link creation for files and folders.
- Share options for files or folders.
- Version options (only for individual files).
- Mark files and folders as favorite.
- Rename a file or folder.
- Move a file or folder.
- Copy the internal ID of each item in the cloud.
- Move a file or folder to the trash
Sorting files
Above your “Files” section you can see the attributes of your data, including: the name, size, and last modified date.
If you click on these options, you can automatically display your data in ascending or descending order.
Display files differently
You can display folders and files (especially images) in the usual list form or as a gallery.
You can switch between the list and gallery view by clicking on the icon consisting of nine squares in the top right-hand corner.
If you are in the gallery view, this icon consisting of 3 lines.